
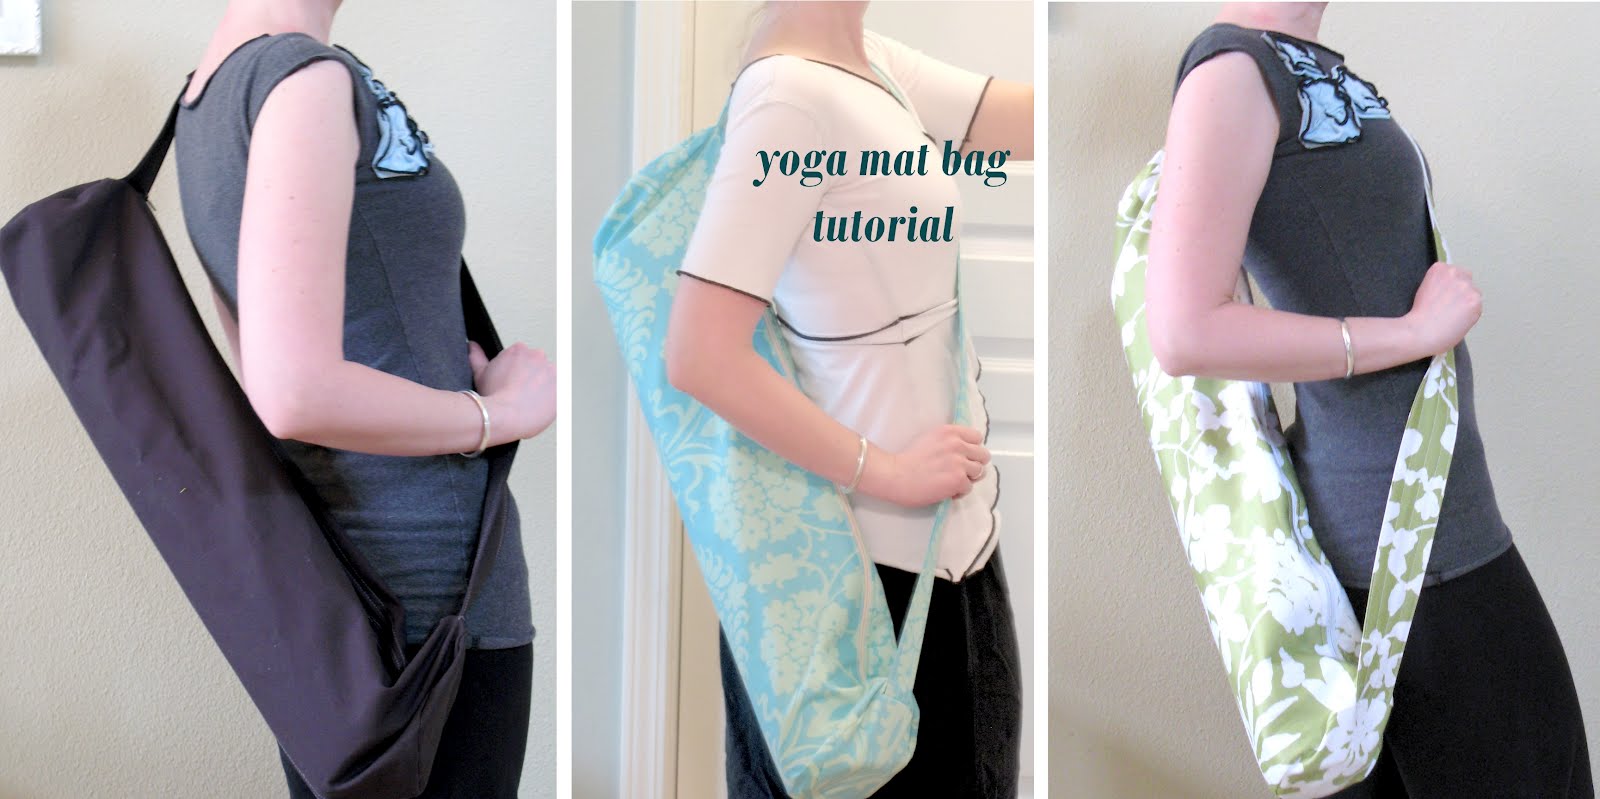
I'm so excited about this spring weather we've been having! Pretty weather calls for pretty tops. So for a limited time, my most popular cap-sleeved style tops are 40% off. May be purchased through my etsy shop. You're welcome :)


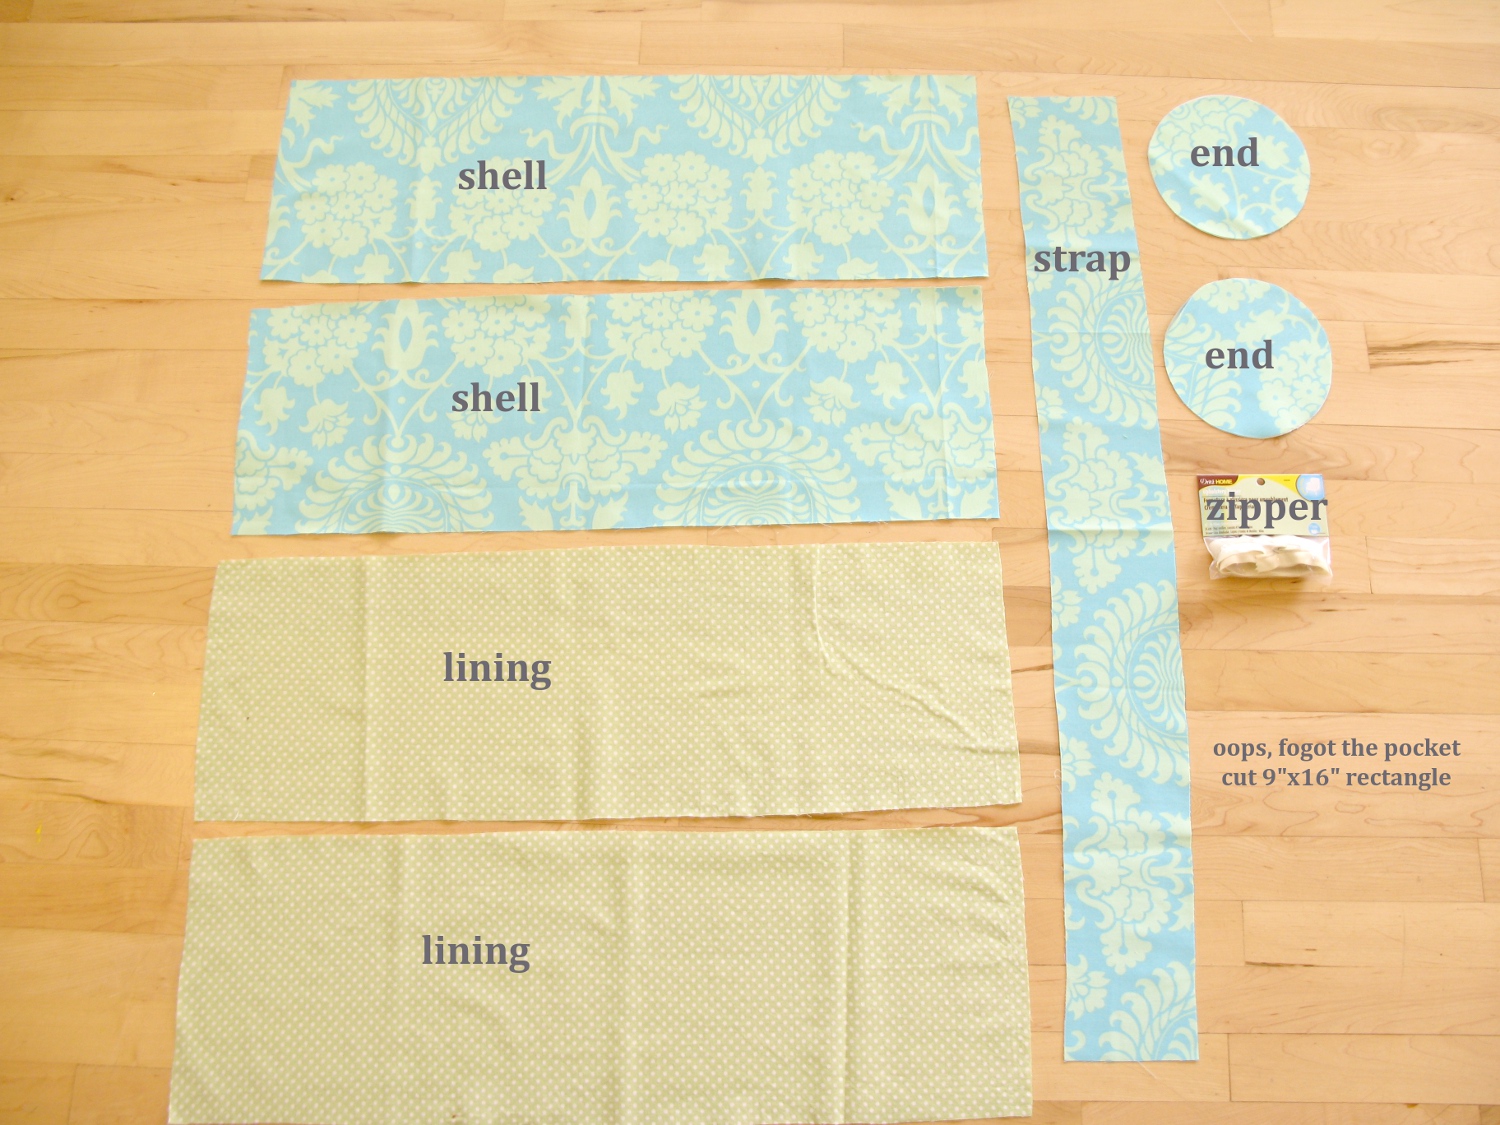
Materials:
♥ bag shell: cut two - 9.5" x 28" rectangles (canvas, twill, home decor weight fabric)
♥ bag lining: cut two - 9.5" x 28" rectangles (quilting cotton or muslin)
♥ strap: 35" x 5" (canvas, twill, home decor weight fabric)
♥ inside pocket: 9" x 16" rectangle (quilting cotton or muslin)
♥ 30" zipper (look in the upholstery section if you can't find one in the zipper section. zipper must be at least 30" but I prefer to use a longer one so it's easier to work around, then trim it down later)
♥ bag ends - cut two (or four if you want them reinforced) circles 7" diameter (canvas, twill, home decor weight fabric)
Pieces:
Step One: Make the Strap
Press the long edges of the strap piece in 1 inch. Fold in half, matching up the pressed edges and press again (like giant bias tape). Top stitch down both long sides.

*Note: Topstitching adds a professional look to your projects. If you're feeling adventurous, quilt your strap with nice straight lines like I did, or use a twin needle and do a double top stitch along the edges.

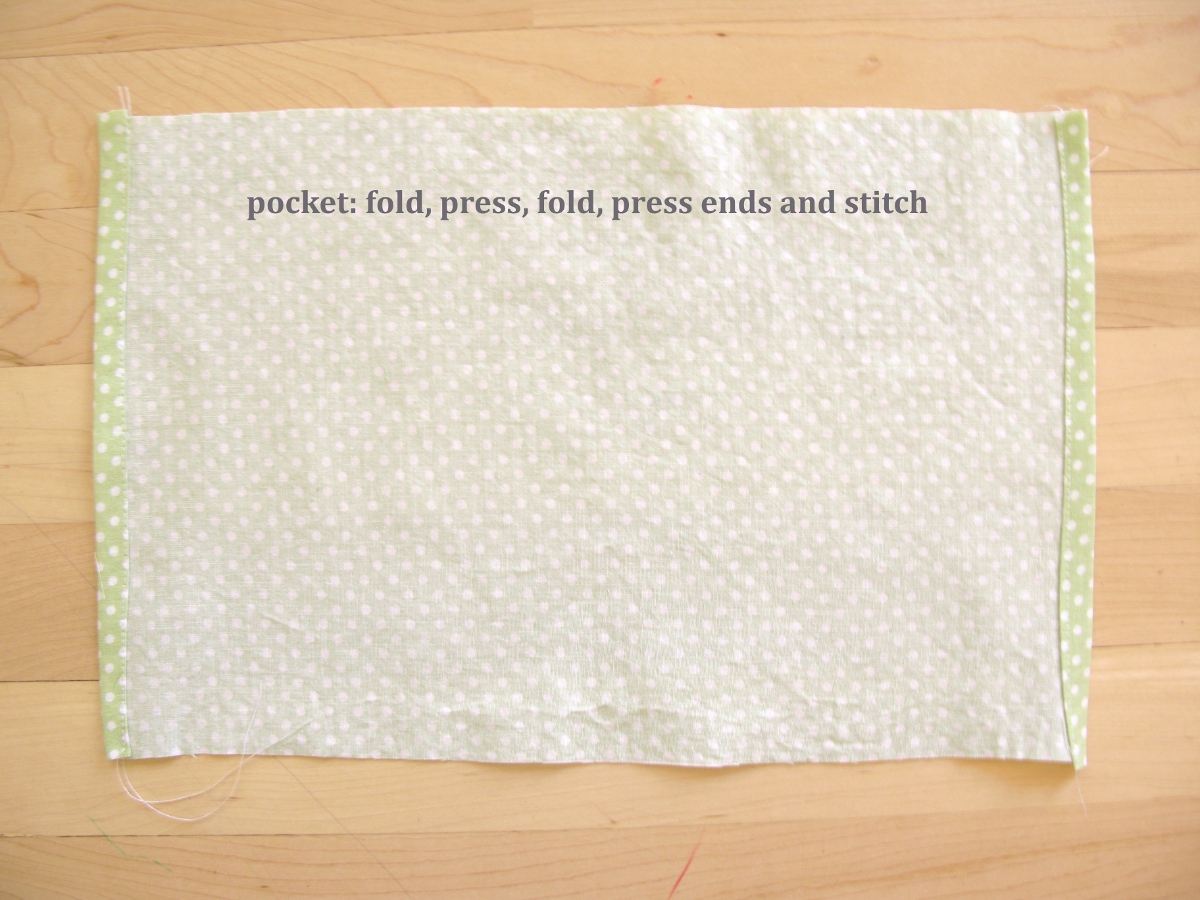
Step Two: Make the Pocket
Fold, fold, press and top stitch both short ends of your pocket piece. (I folded about 1/4 inch). Fold right-sides together overlapping the ends 1". You want to offset the flap so your opening is towards the top as shown. Stitch down both sides. Turn right-side out and press. Center pocket on one of the lining rectangles and stay stitch at top.


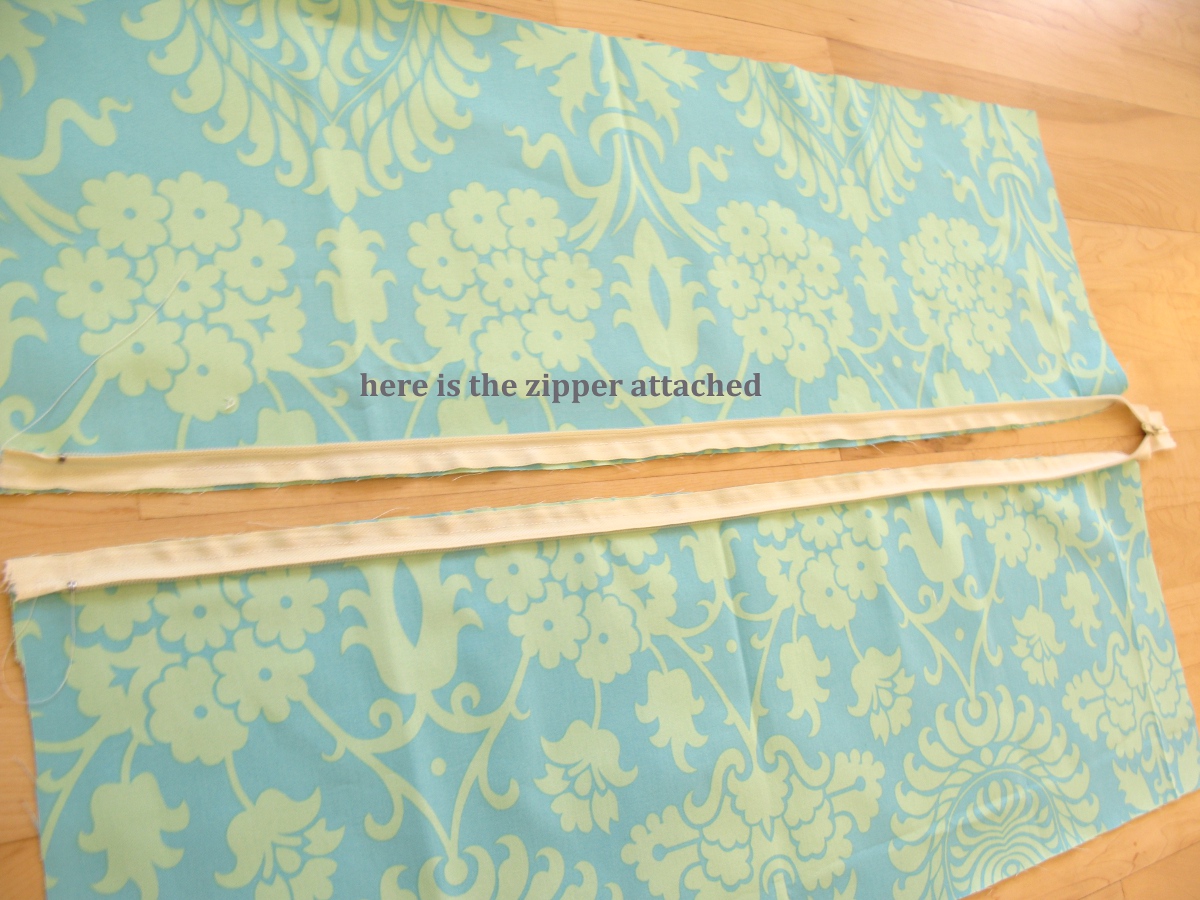
Step Three: Attach the Zipper to the Shell
Lay your shell pieces next to each other, right-sides up. Open you zipper and center between your pieces, aligning the top of the zipper with the top of the rectangles. Flip each zipper side to the rectangle next to it, and pin the top in place so the ribbon edge of the zipper is aligned with the fabric edge and the coil edge is inward on your rectangle (right sides of zipper and rectangle together). Use a zipper foot to attach zipper to each shell piece.

Step Four: Attach Lining to Zipper
Start with the pocketed lining panel and lay right-sides together with one of the shell panels (zipper will be in between them). Use your zipper foot and sew lining along the zippered side. You'll be sewing through the zipper blind, so take care not to sew too close or through the coils. Repeat for other lining panel. Turn the panels right side out so the zipper coils are out and the shell and lining panels are together. Press along the zipper seam (the iron can melt your zipper coils, so never iron over them). Top stitch down each side through both the shell and lining layers. This will help prevent fabric from getting stuck in your zipper coils during use.
*Note: Steps 3 & 4 can be done in one step if your confident in your zipper sewing skills.


 Step Five: Sew the Shell
Keep your zipper open. Bring your shell panels right sides together and stitch down the long end opposite the zippered side. Press seam open and top stitch along each side of seam.


Step Six: Sew the Lining
Bring your lining panels right sides together and sew long end. No need to topstitch unless you want to. Press seam.

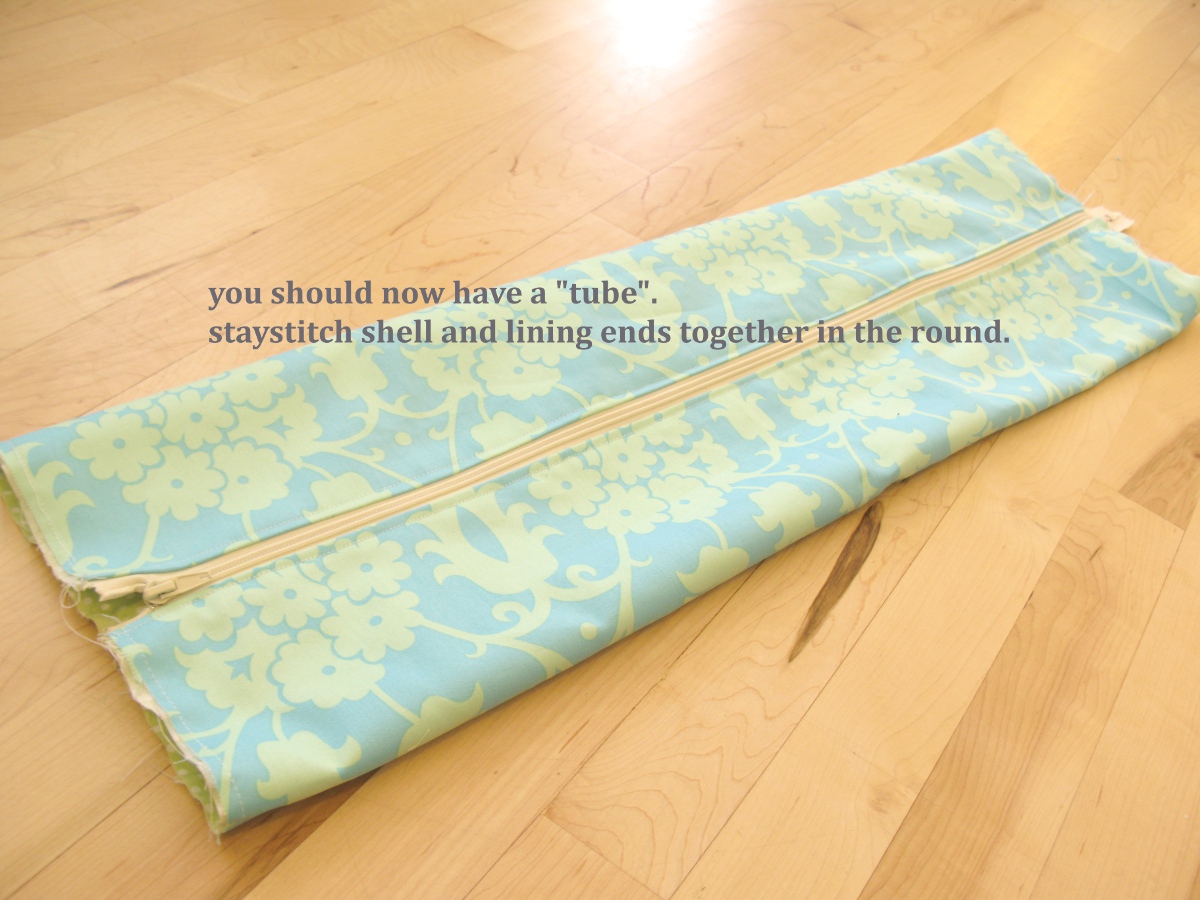
Step Seven: Stay stitch
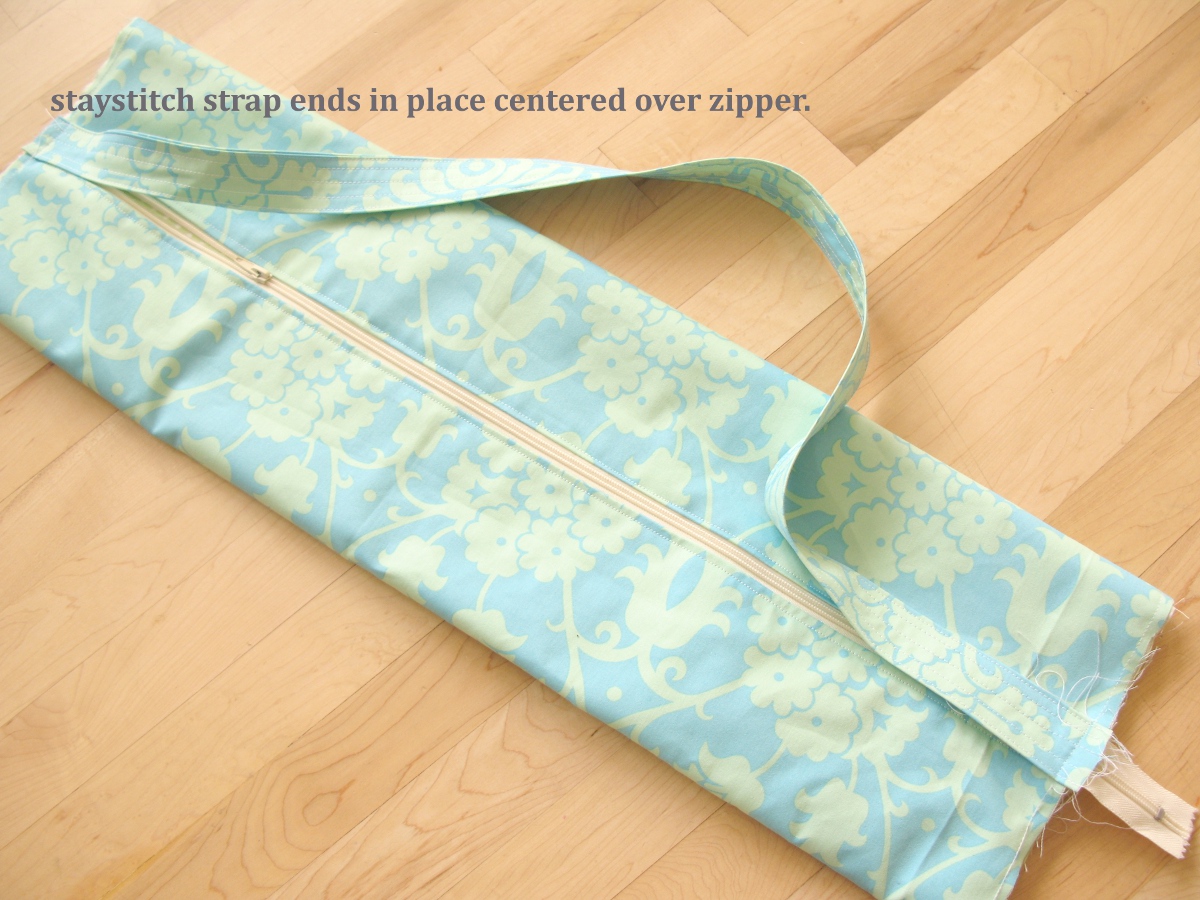
You should have a "tube" at this point. Stay stitch the lining and shell layer together at each open tube end. Pin the strap ends over the zipper ends and stay stitch those in place as well. Adjust the zipper as needed, but make sure the zipper pull is on the right side before stay-stitching your strap end.
Step Eight: Attach End Circles
When attaching a circle, I like to cut the circle a little bigger than the opening diameter. It's better to have a bigger circle and take it in, rather than a smaller circle and have to adjust the panels you just worked so hard on. Right side of shell to right side of circle, work on the round and pin every couple of inches, adjusting your pins until you get it just right. Sew just inside your stay stitch line... Go slow and feel with your fingers as you sew around the circle, smoothing out the layers to prevent any bunching. I sew around the circle twice to reinforce. Then trim with pinking shears OR hide seam with bias tape for a professional finish. Turn right side out and press the circle seam as best you can.


Step Nine: Reinforce the Strap
Stitch the strap over the zipper 1/2 inch in. It's very easy to catch extra layers when doing this, so slip the bag end over the machine free-arm and double check by feeling with your fingers for extra bulk.


